1LABYRINT CONSTRUCTION
- 3x polystyrene panels (50x100 cm with a thickness of 20 mm)
- 1x (liquid) glue
- 10x A3 paper
- 1x cutter/scissors
- 1x long ruler or folding rule
- 1x adhesive tape
- 1x pen for markings
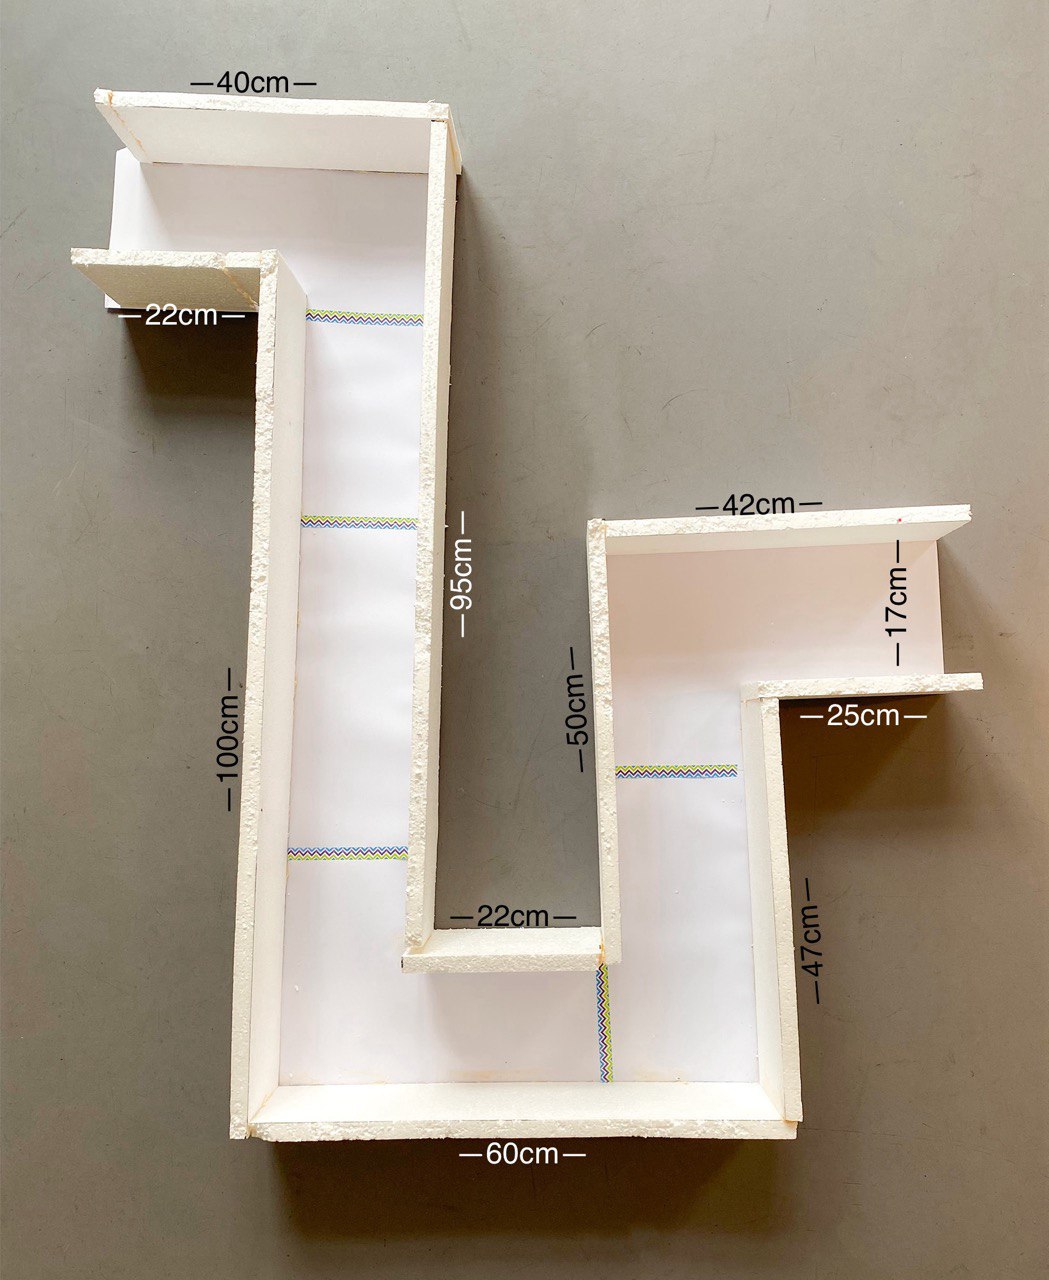
- Mark sections with a width of 14 cm and a length of 100 cm on the polystyrene sheets and cut them out.
- Adjust the length of the sections according to the length of the labyrinth walls and also cut to size.
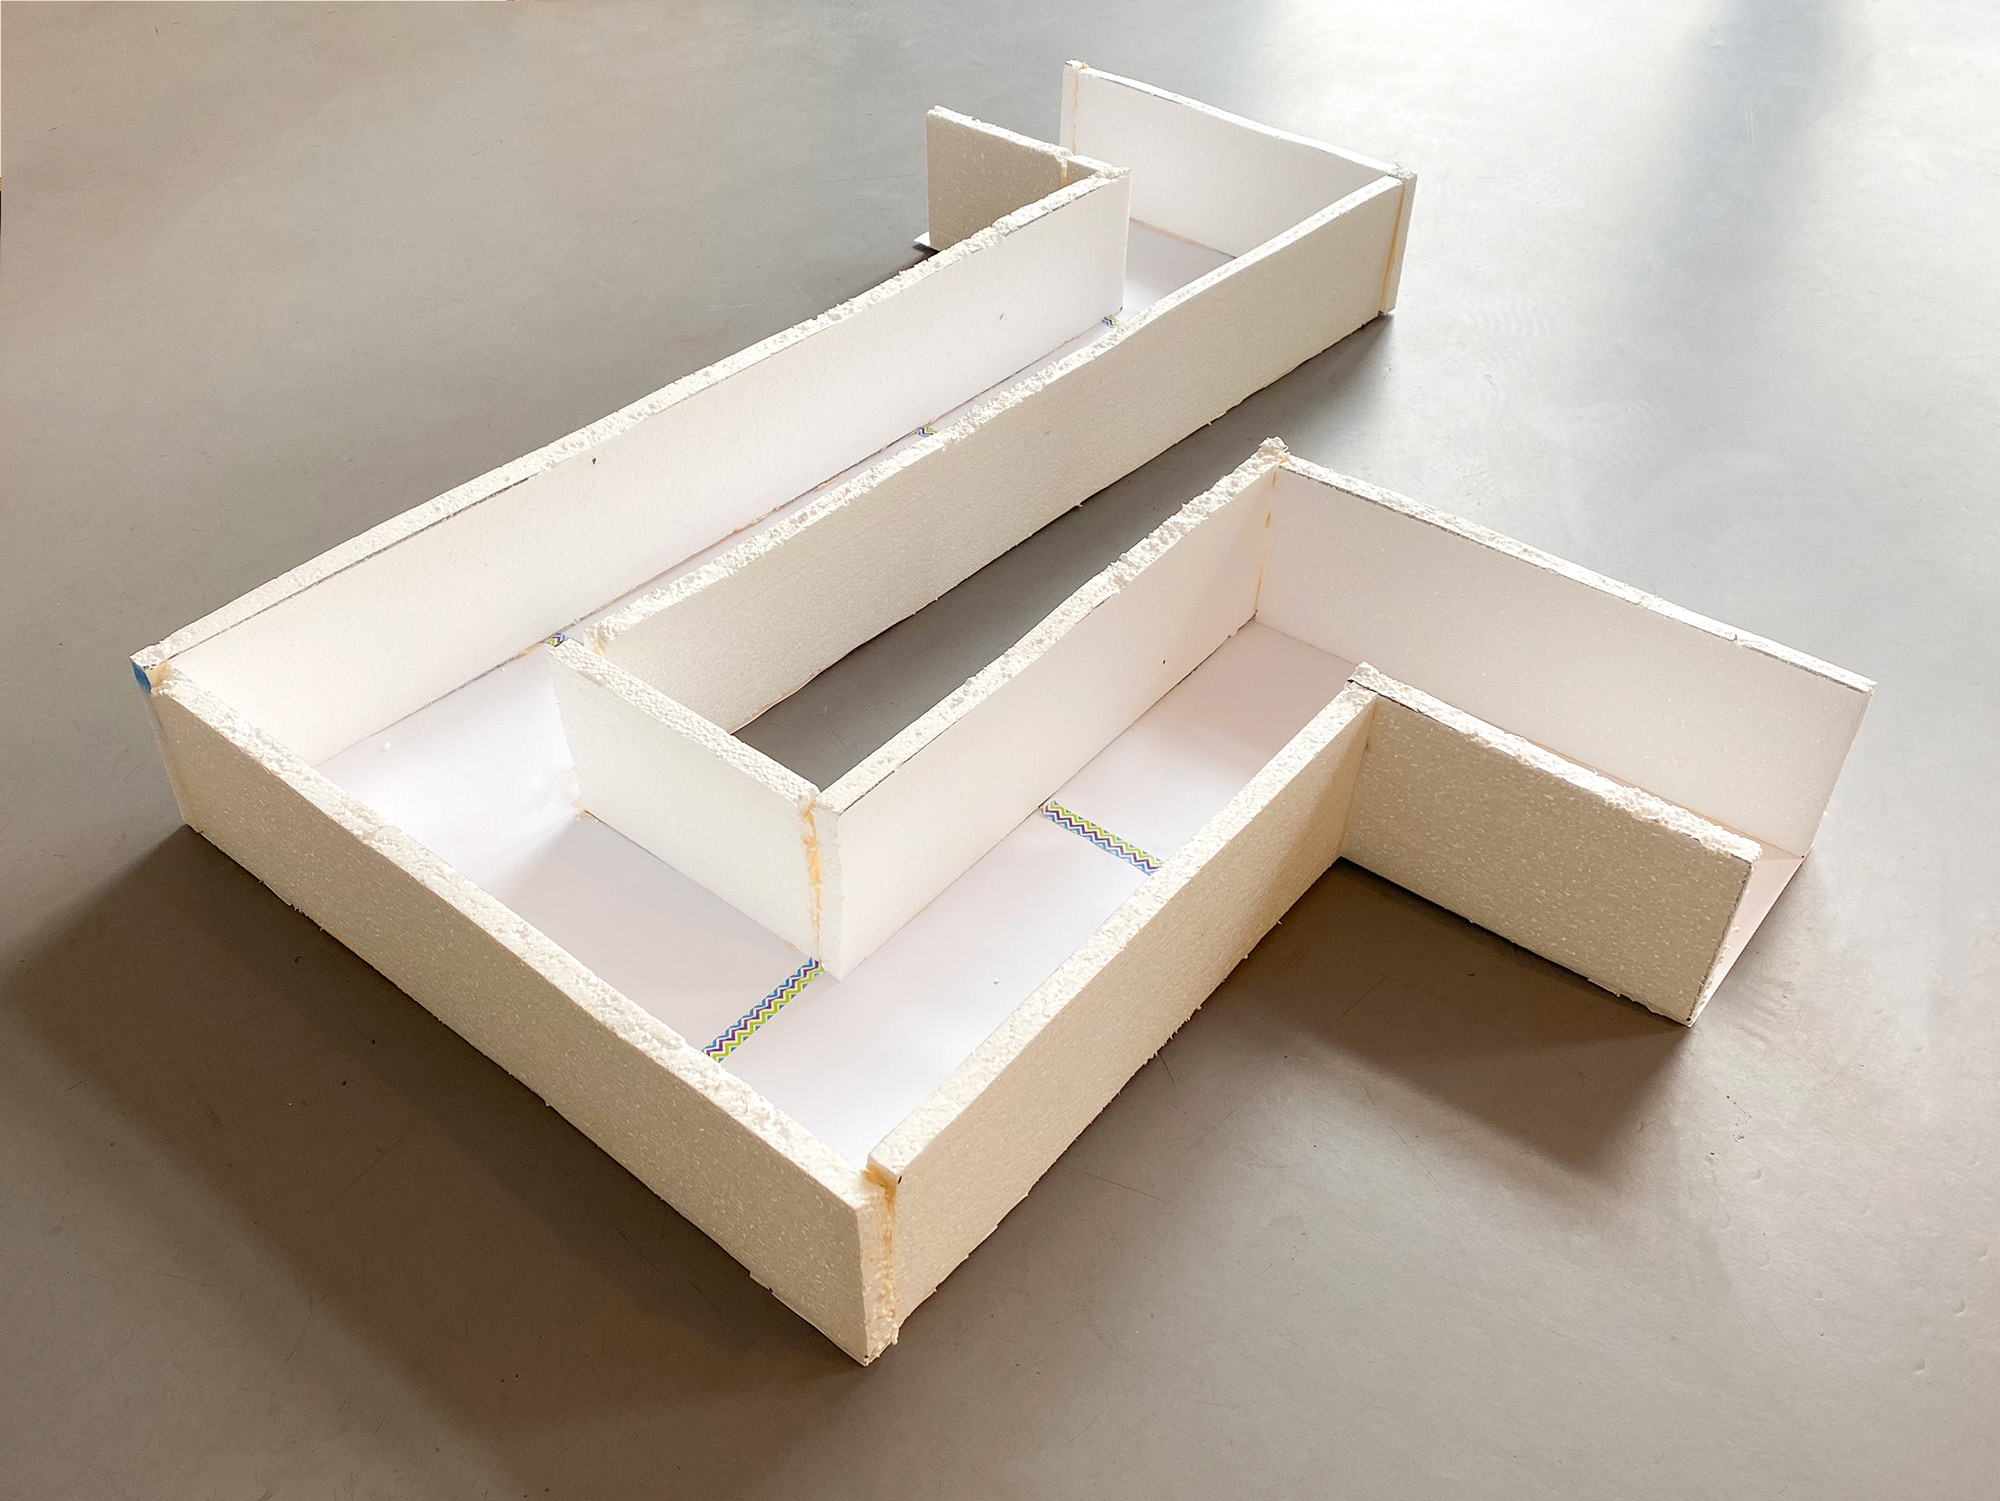
- Glue the labyrinth walls together. Stick the paper under the walls as a floor.
- Cover the unevenness of the paper with the adhesive tape.
2EXTENSIONS
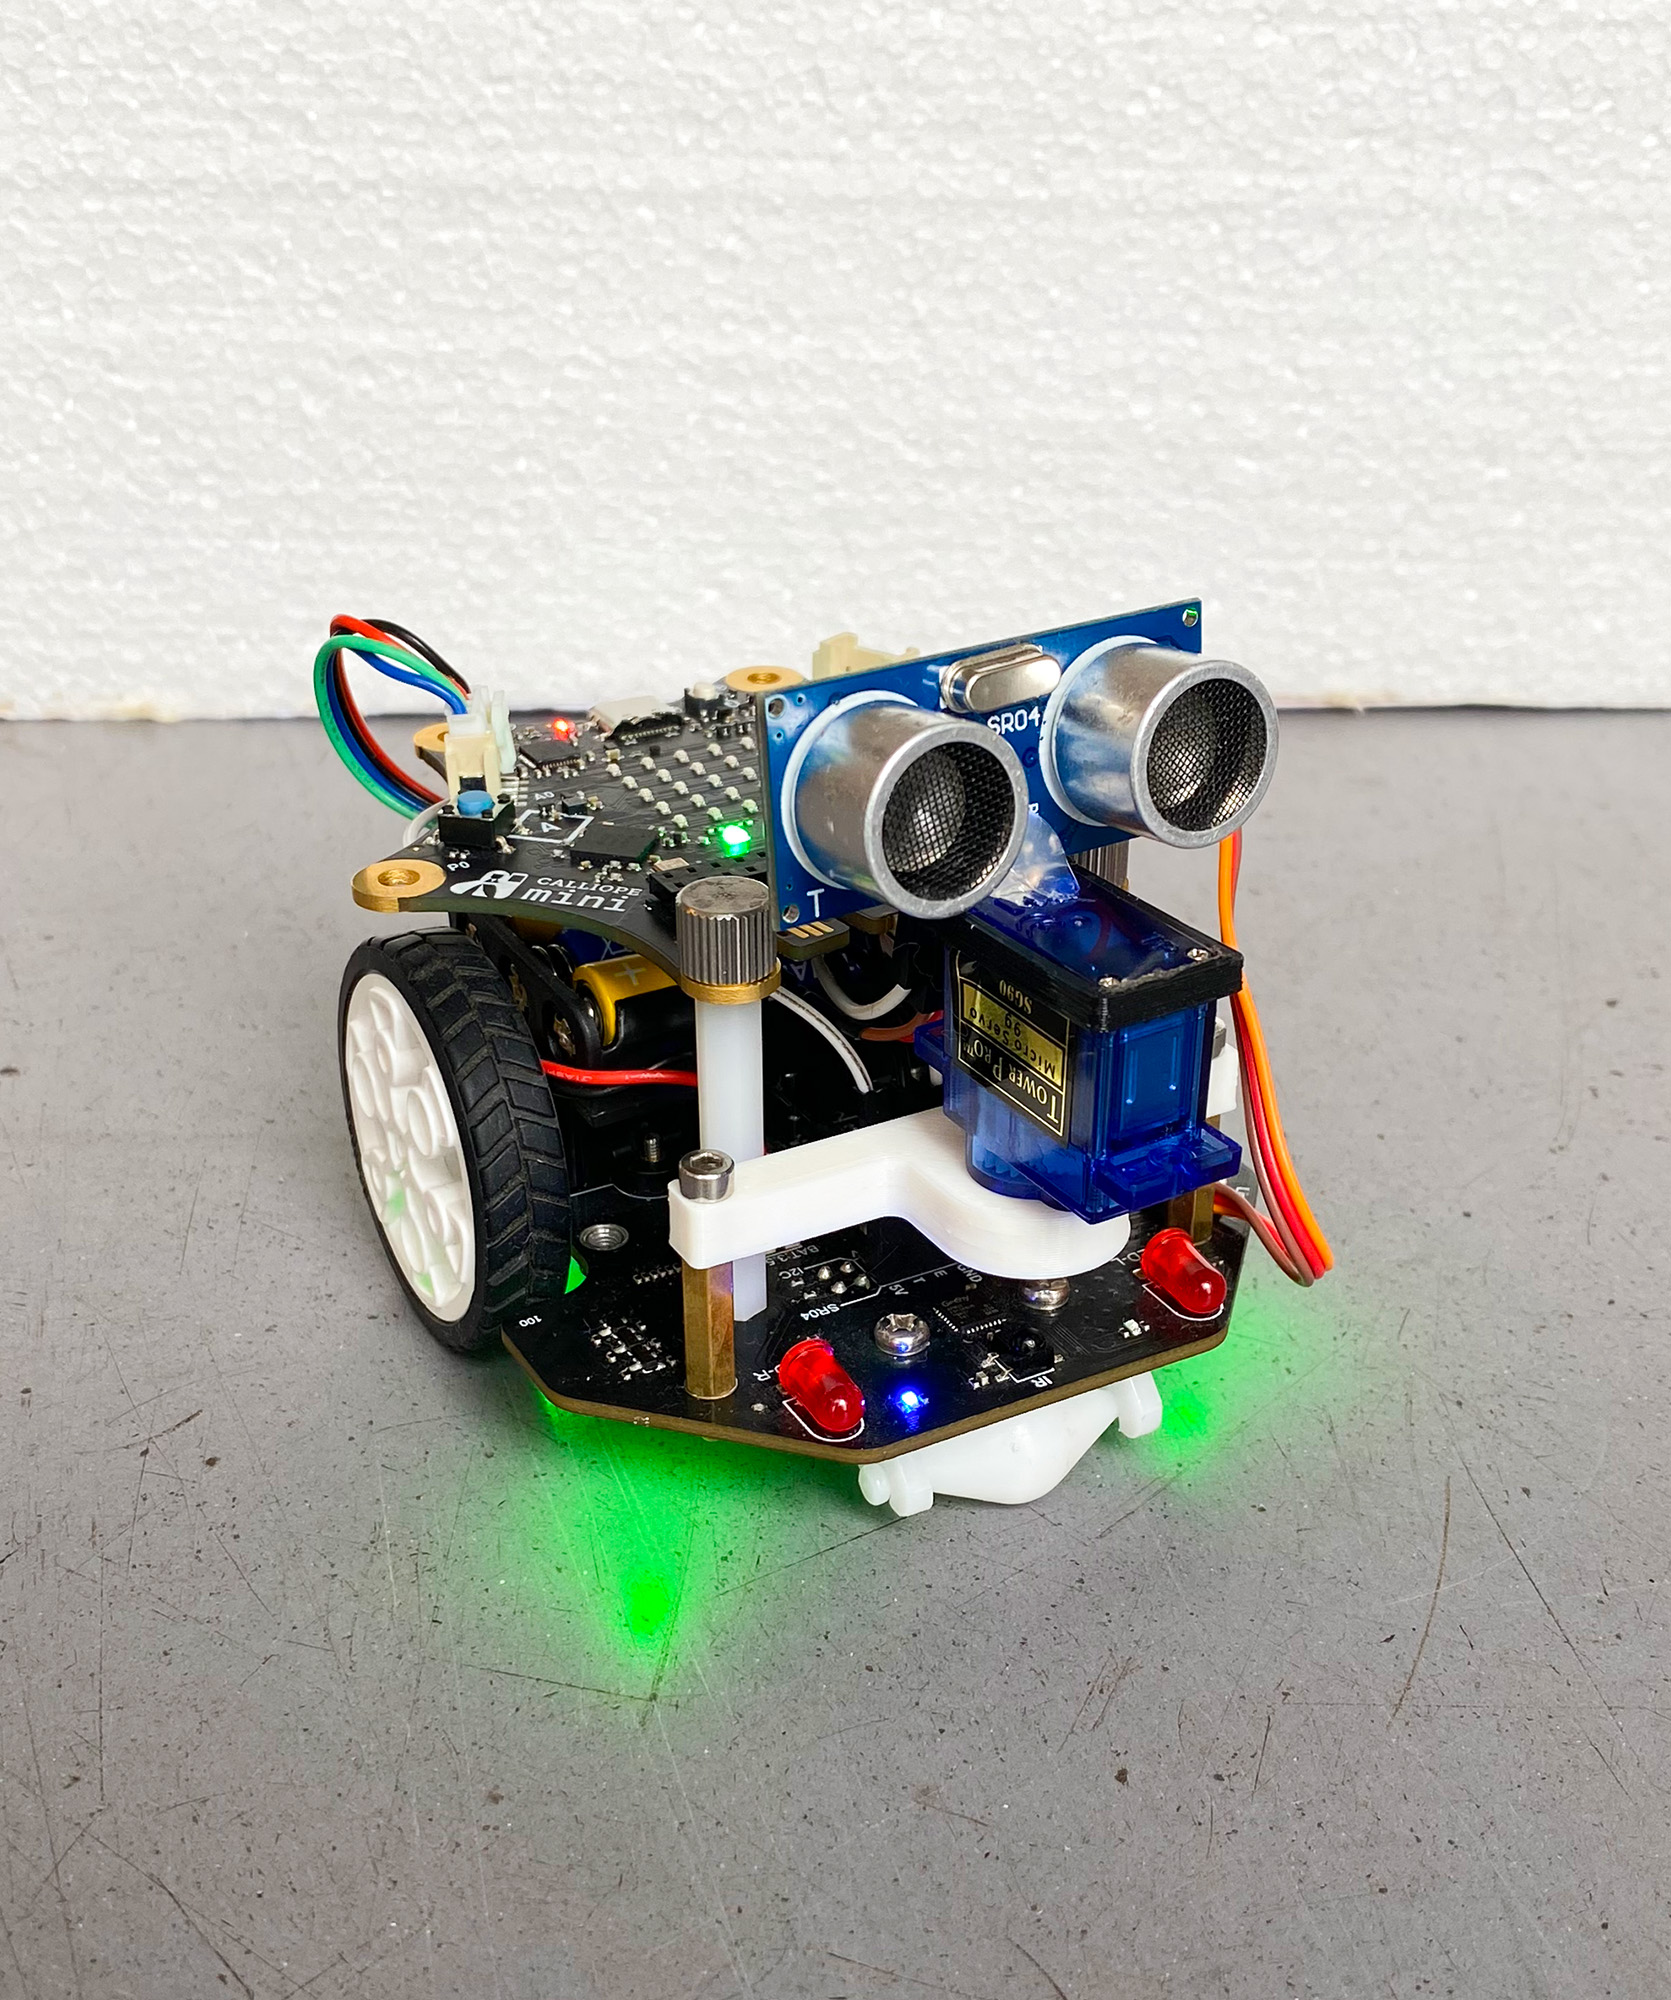
The mobile base is the MotionKit V2.
MotionKit 2
A 180° servo motor is also required.
3PARTS
The Calliope mini uses the ultrasonic sensor from the MotionKit to recognize the labyrinth walls. The ultrasonic sensor is attached to a servo motor for a 180° view. To mount the servo motor, two brackets can be printed with a 3D printer or another creative mounting method (e.g. cardboard and glue) can be used.
3D PRINTER
- 1x bracket on the MotionKit (printing time: 14min)
- 1x holder for the ultrasonic sensor (printing time: 5min)
Parts for mounting in STL format:
Download
4PROGRAMMING
Programming is carried out in the MakeCode Editor, and the “MotionKit V2” extension must also be loaded.
PROGRAMMCODE
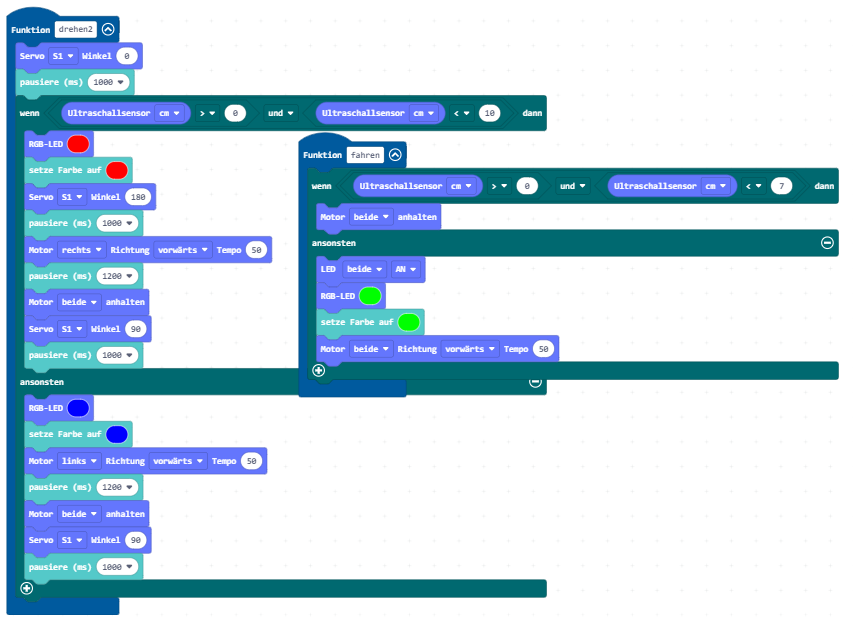
- The “Status” variable is needed to simply switch the program on and off, even if the MotionKit is not connected to a cable.
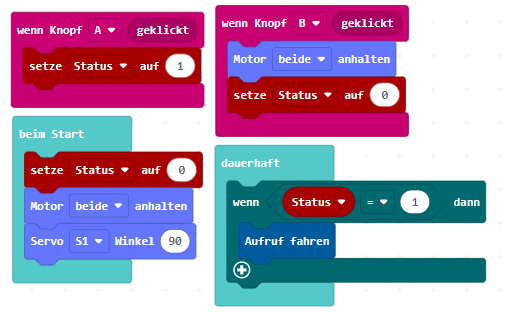
- The “move” and “rotate” functions are responsible for a compact and easy-to-read display of the code.
