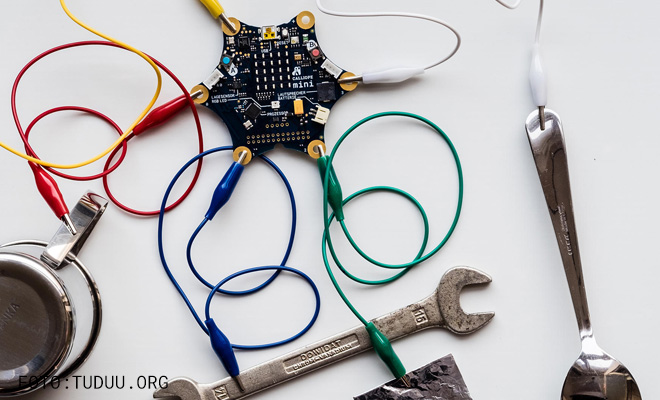
For the piano, use the golden connectors on the corners of the Calliope mini.
Take a crocodile clip and connect it to the negative connector. We'll need the other end of this clip later.
The connections 0-3 on the Calliope mini are positive terminals. You can now connect an object or some tin foil to one of these four connectors using the crocodile clip.
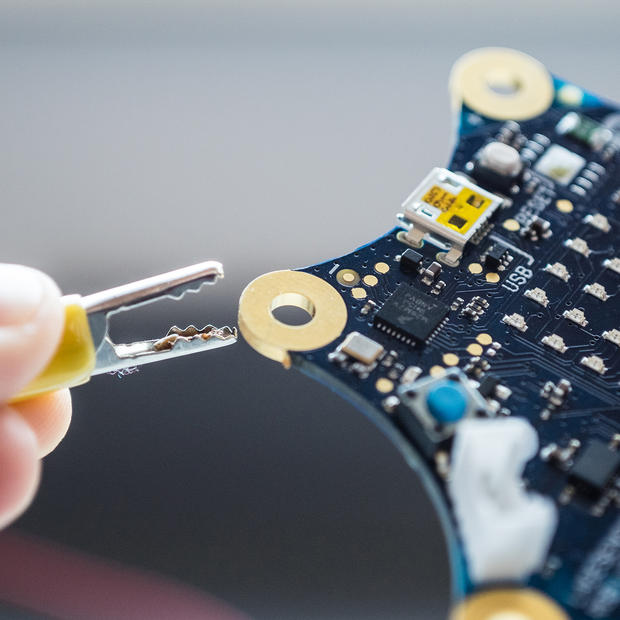
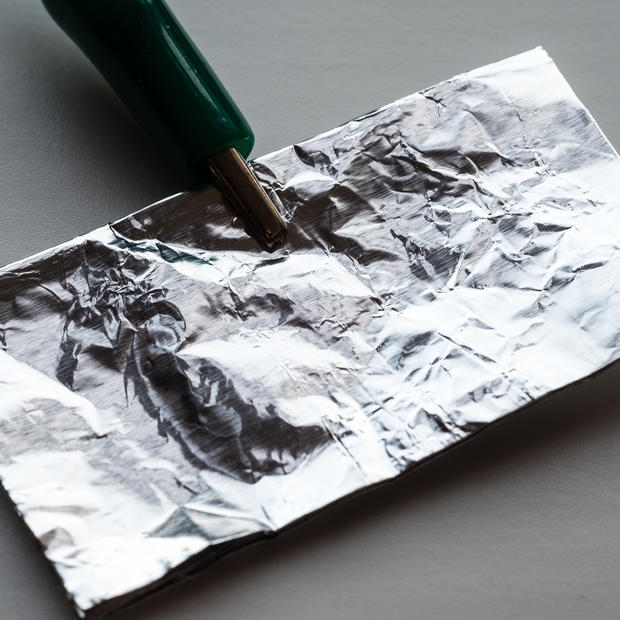
Hint: to enable the Calliope mini to detect that an object is touched, the circuit must be closed. For a closed circuit, you always need one negative and one positive pole.

Now connect three more conductive objects to terminals 1-3 on the Calliope mini.
Whenever one of the objects is touched and the circuit is closed, a sound should be played.
You need the programming command "on pin ... pressed" from the group "Input" and the programming command "play note..." to create different tones from the group "music". On your Calliope mini you can see that the golden connectors are numbered from 0-3. In the programming interface, these connectors are called Pin P0-P3.
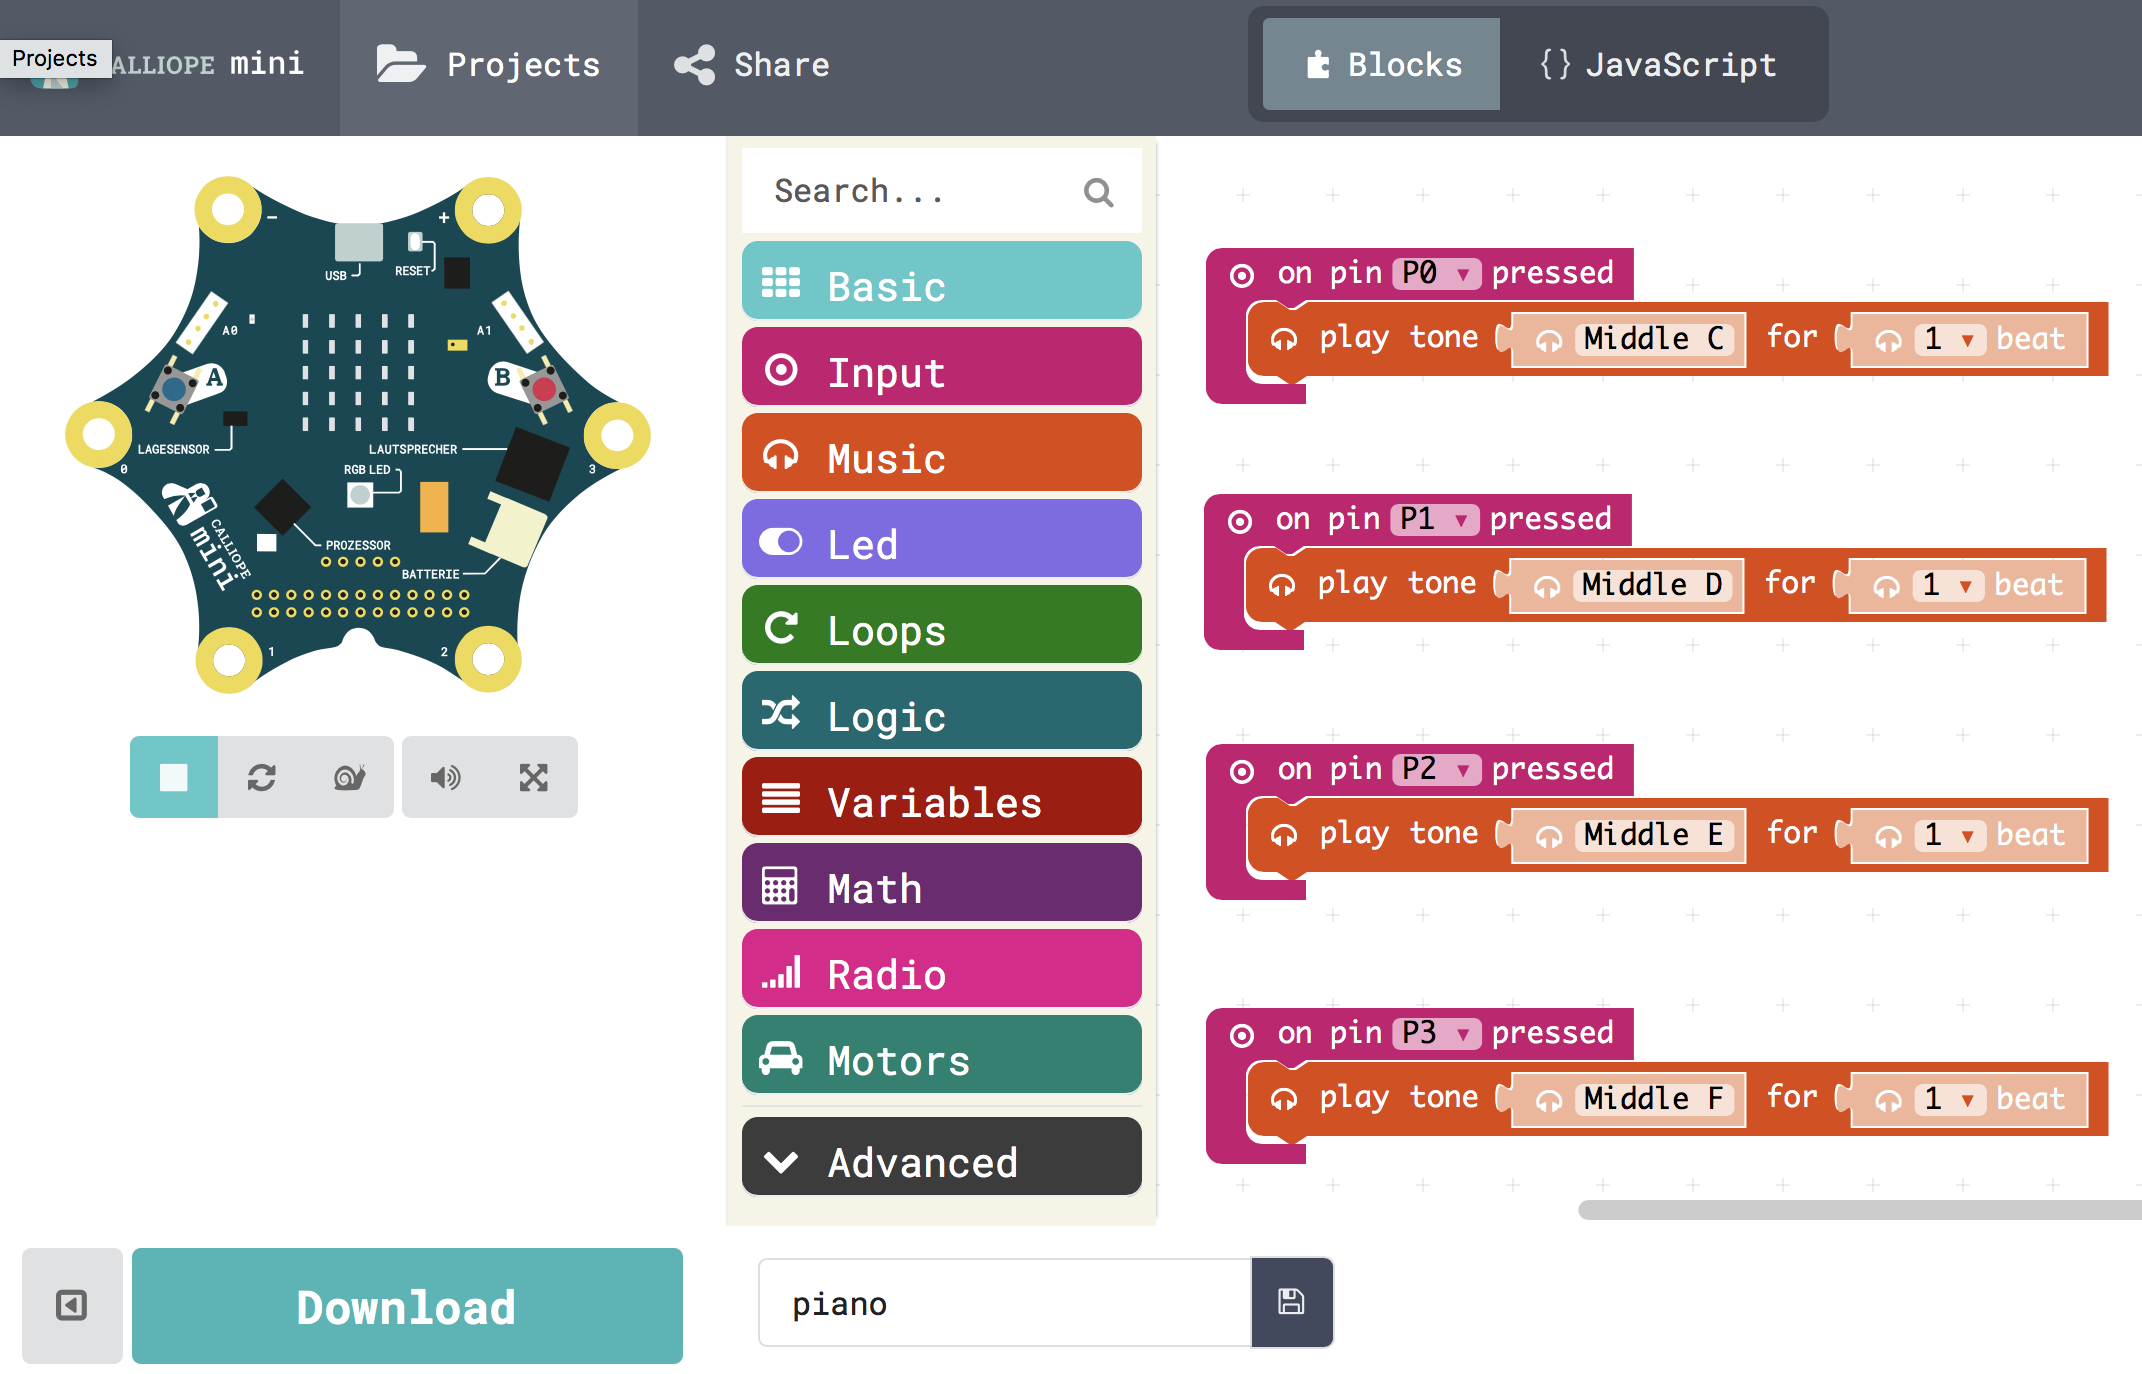
Now you have to drag such a block into the programming area for the connections P0, P1, P2 and P3. You can change the tones accordingly. For a normal piano, the sequence is C D E F (G A H).
We did it! You set up your piano and did the programming.
Now hold the crocodile clip, which you have connected to the minus pole, at the metal end. You can now touch the objects with your other hand and create sounds.
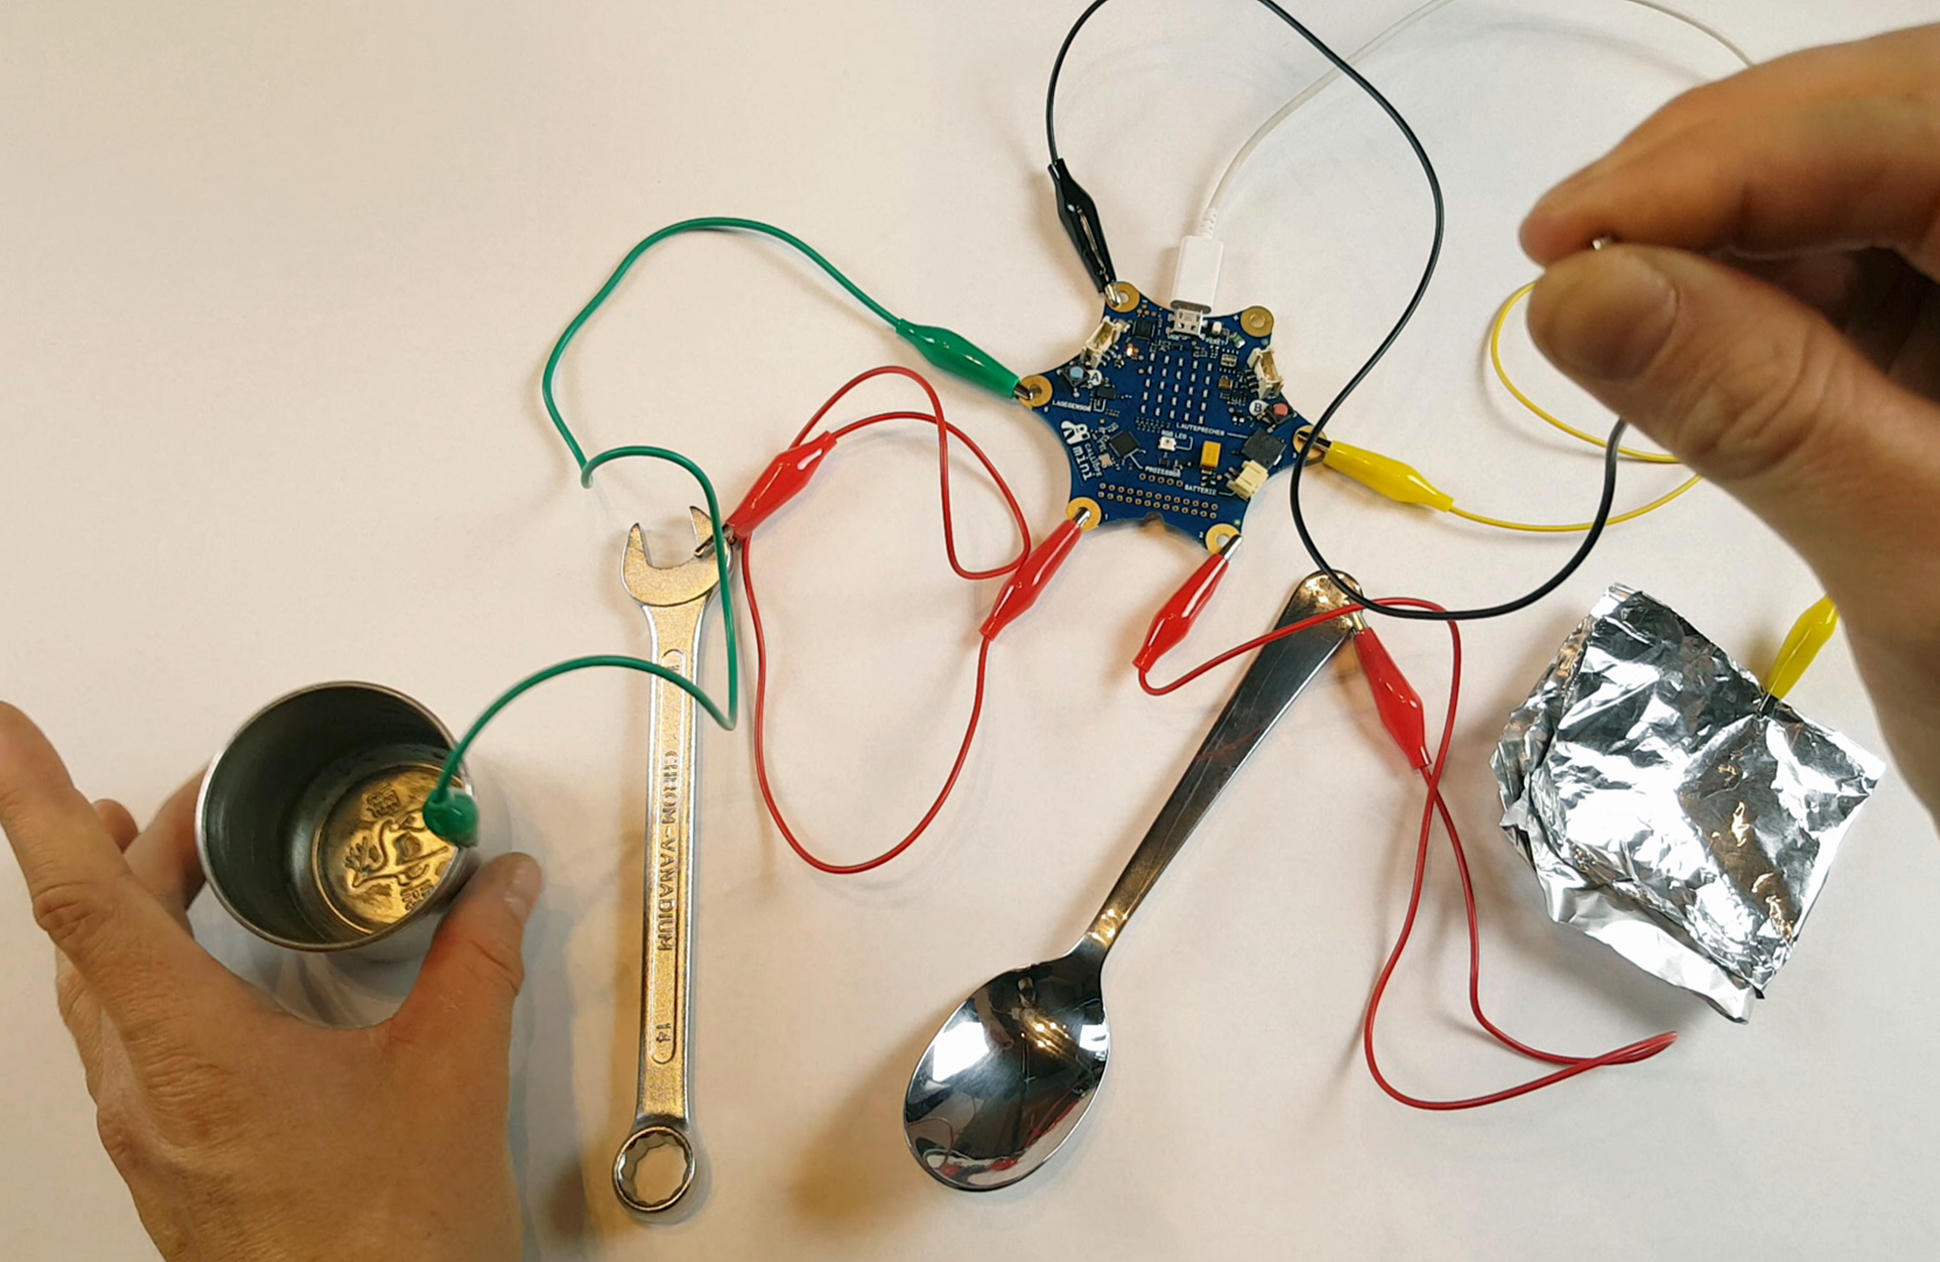
A visual demonstration of the project can be seen on YouTube popup: yes.
We have taken the idea and instructions for the project Calliope mini piano from the publication Calliope-Buch popup: yes, published by dpunkt popup: yes in 2017, with the kind permission of the publisher. It was originally published in German and translated into English by the Calliope team.


