| Developer/Provider: | Calliope (adaptation for the Calliope mini), Open Source development by Arduino, board extension by Sandeep Mistry with many other community members |
| Application Type: | Application |
| Operating System: | Windows, Mac, or Linux computers |
| Calliope mini Version: | V3 (V2, V1 see FAQ) |
| Account Required: | No |
| Installation: | Yes |
| Usable Offline: | Yes |
Since the Arduino development environment has been available for a long time and offers an easy entry into text-based programming of microcontrollers, it enjoys great popularity worldwide. For those who want to program the Calliope mini 3, the "board extension" has now been updated. This allows sketches to be transferred to the Calliope mini. Just download and install!

Integrate Calliope mini
Prepare Board Management
To program the Calliope mini with the Arduino IDE, an extension is required.
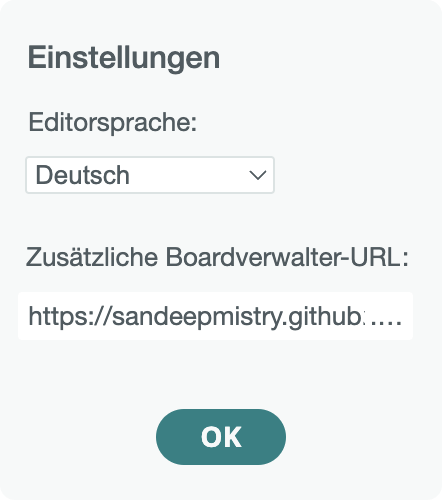
Add the following URL under Arduino IDE - Preferences as an "Additional Board Manager URL":
https://sandeepmistry.github.io/arduino-nRF5/package_nRF5_boards_index.json

The language can be selected under Preferences.
Add Board Package
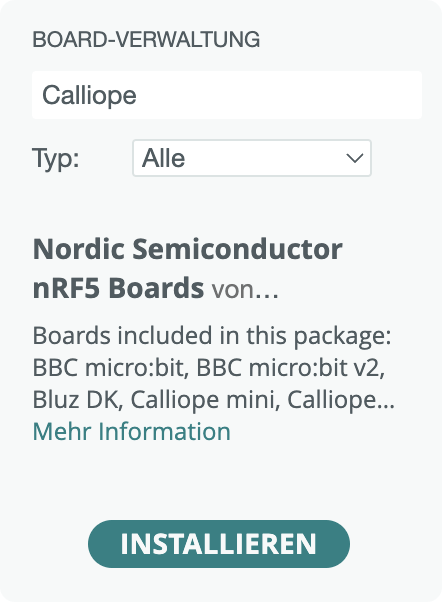
- Open Board Management under Tools-Board.
- By entering "Calliope" in the search, the extension "Nordic Semiconductor nRF5 Boards" appears.
- Install the extension. This can take up to a minute.

Add Library
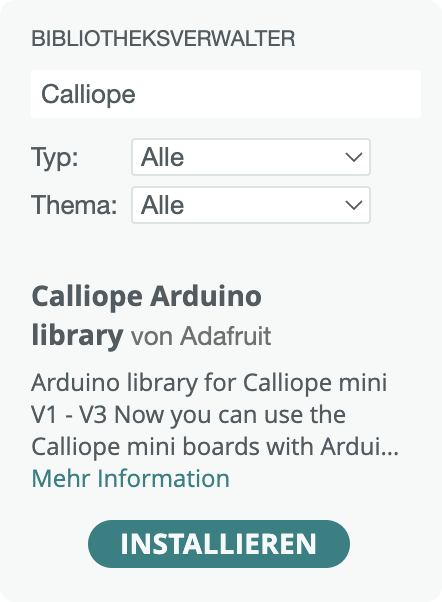
- Open the Library Manager under Tools-Libraries manage.
- By entering "Calliope" in the search, the library "Calliope Arduino Library" appears.
- Install the library.

Note: When prompted to install library dependencies, choose "install all".
Connect Calliope mini
If the Calliope mini V3 is connected to your computer via USB, a direct sketch upload is possible.
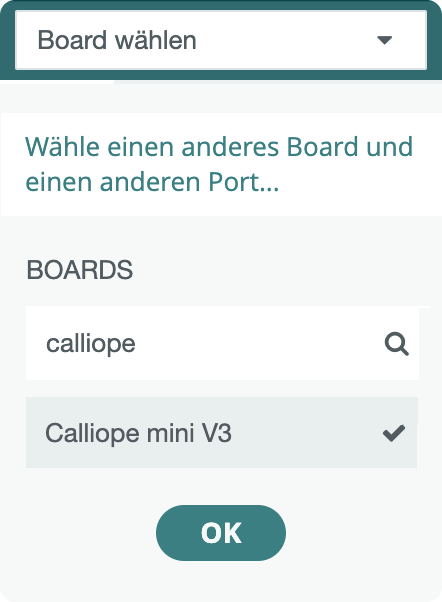
- Go to "Select Board"
- Open the selection with "Select a different board and port..."
- Select Calliope mini V3 as the board.

The Calliope mini V3 appears as the selected hardware in your window, and you can now program it directly.
Example Programs
Via File-Examples-Calliope Arduino Library the program "miniV3example" can be loaded.
The example program for the Calliope mini lights up the 3 RGB LEDs, displays various symbols on the LED matrix, responds to button presses with changed RGB LEDs, and activates the motors. Additionally, information is sent via the serial interface and the measured volume is displayed as a number between 0 and 10.
Programming Concepts
| Block-based Programming | No |
| Text-based Programming | C++ |
| Multithreading | Yes |
| Events (event-based programming) | No |
| Variables | Yes |
| Lists | Yes |
| Loops: While / For / Foreach | Yes / Yes / Yes |
| Functions / with Parameters / with Return Value | Yes / Yes / Yes |
| Serial Communication | Yes |
| Sensors/Actuators Extensions | Yes, they can be imported as external libraries |
FAQ
To use the Arduino IDE with the Calliope mini 2.0, the USB firmware for mini 1.3 is needed.
To transfer the USB firmware, the following steps are necessary:
- Disconnect the Calliope mini from power!
- When plugging in the USB cable, hold down the reset button.
- Now the Calliope mini registers as a drive named "MAINTENANCE".
- Copy the USB firmware file to this drive.
Warning! Using firmware 1.3 disables the ability to use the flash. Transferring the USB firmware 2.0 re-enables the ability to use the flash.
Transferring a program from the Arduino IDE to the Calliope mini 2.1 is possible with the following steps:
- Sketch - Export Compiled Binary
- Drag the exported .HEX file onto the MINI drive.

