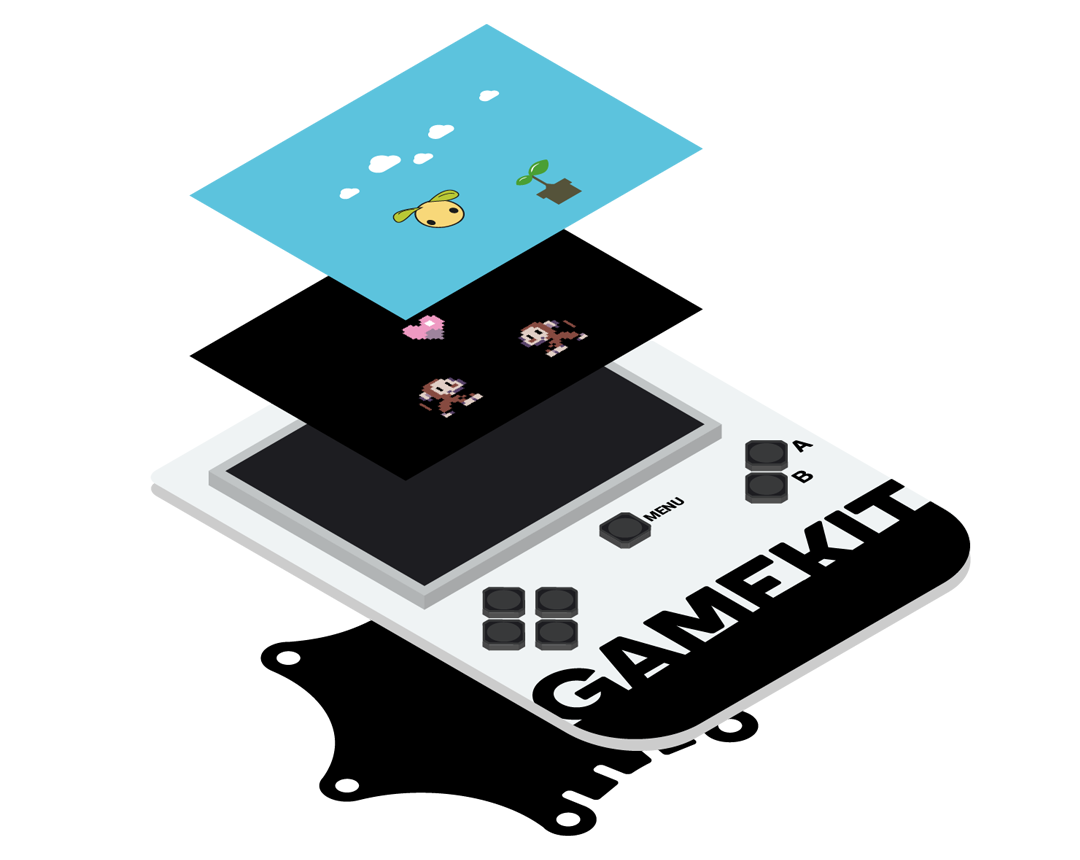
GameKit
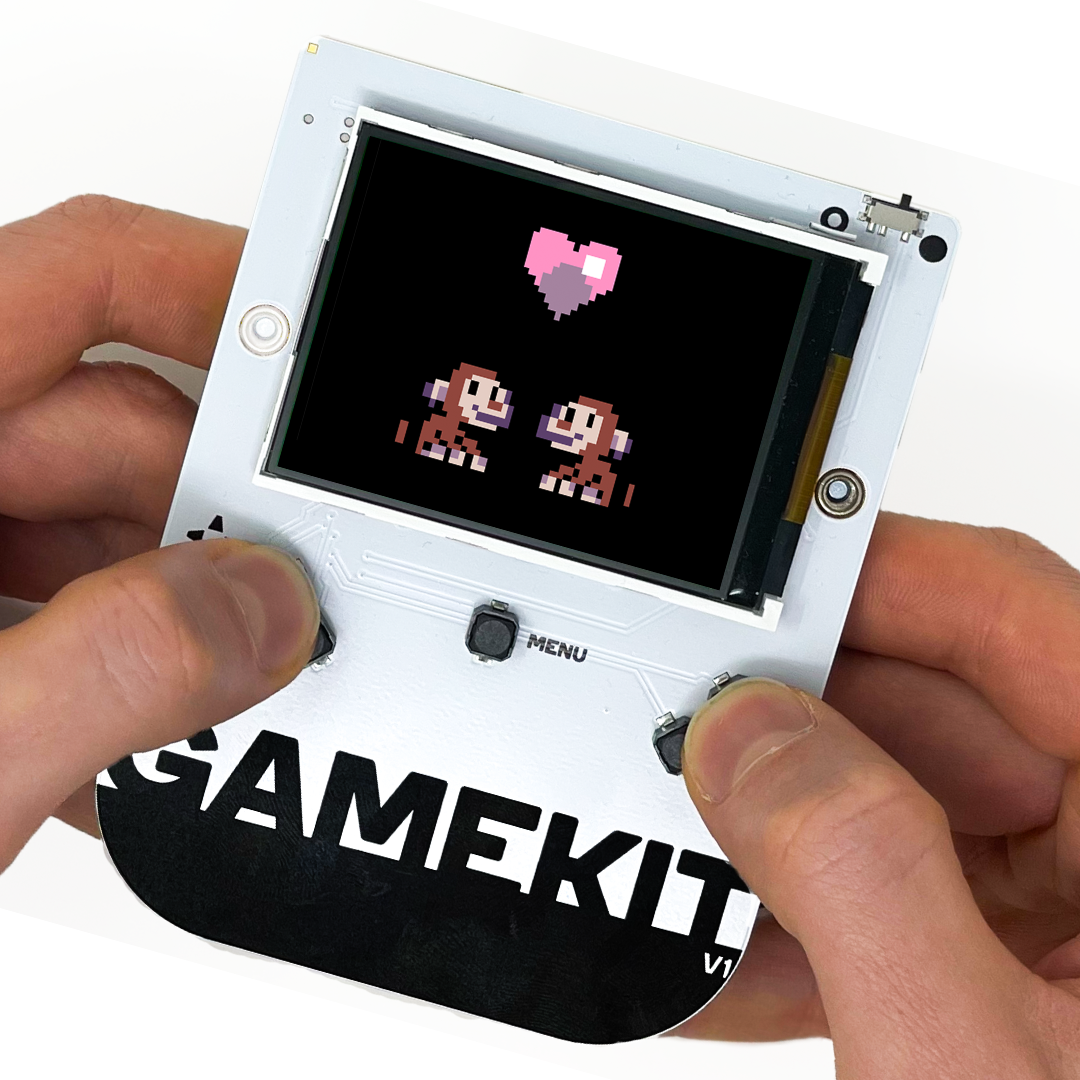
The GameKit is an arcade console with buttons and a large display for the Calliope mini. With the GameKit, you can learn basic programming skills in a fun way and develop and implement your own games.
The GameKit Box contains the following items:
• GameKit circuit board
• 2 mounting screws
• Battery holder (3 x AAA)
• Quick start guide
The GameKit is only compatible with the Calliope mini 3.
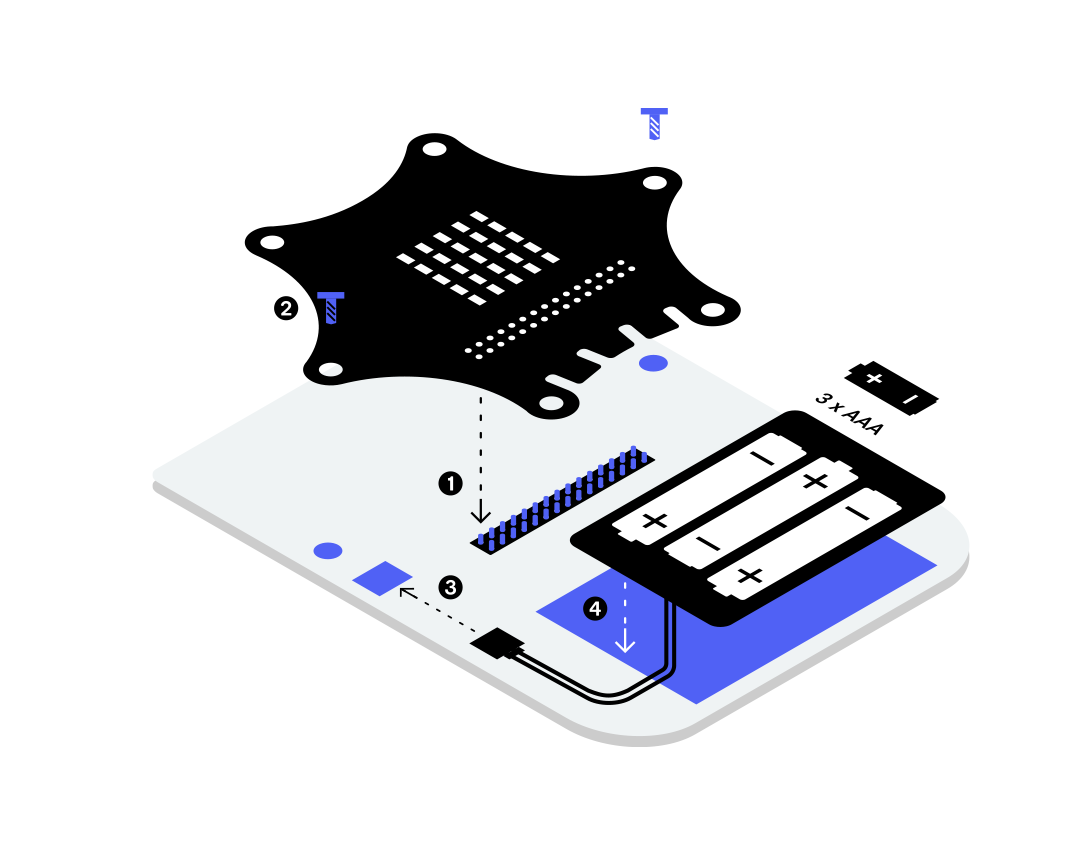
Easy assembly
- First, assemble the Calliope mini and the GameKit back to back. The Calliope mini is plugged into the pin header on the underside of the GameKit.
- Then secure the Calliope mini with the two screws.
- Next, connect the battery compartment plug to the connector on the GameKit for the power supply.
- Finally, attach the battery compartment to the GameKit using the adhesive strip.
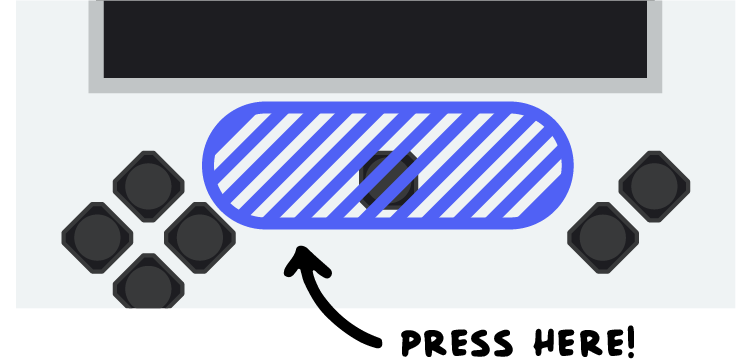
Press the GameKit carefully but firmly onto the pin header. Do NOT touch the display when pressing down. Apply pressure only to the area below the display. Make sure that the Calliope mini is completely and firmly seated on the plastic strip.
Programming
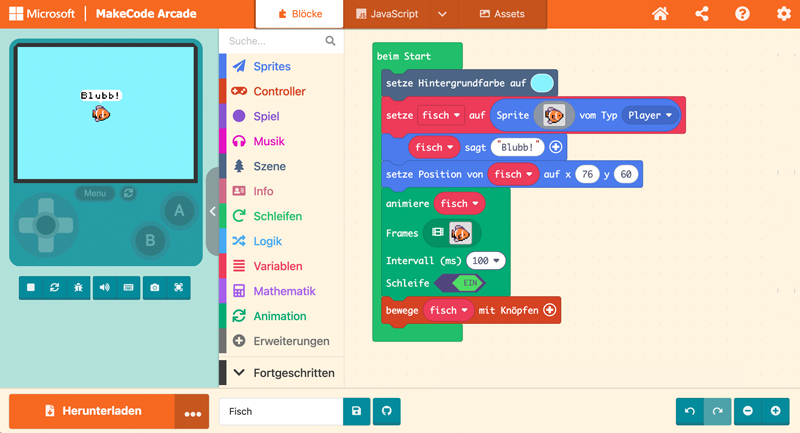
The GameKit can be programmed using the MakeCode Arcade platform. In the browser-based programming environment, retro games can be implemented using block programming or JavaScript/Python.
MakeCode Arcade offers many templates and tutorials and allows games to be tested directly in the browser or transferred to the GameKit. MakeCode Arcade is ideal for creative projects at home and in computer science classes.
MakeCode Arcade
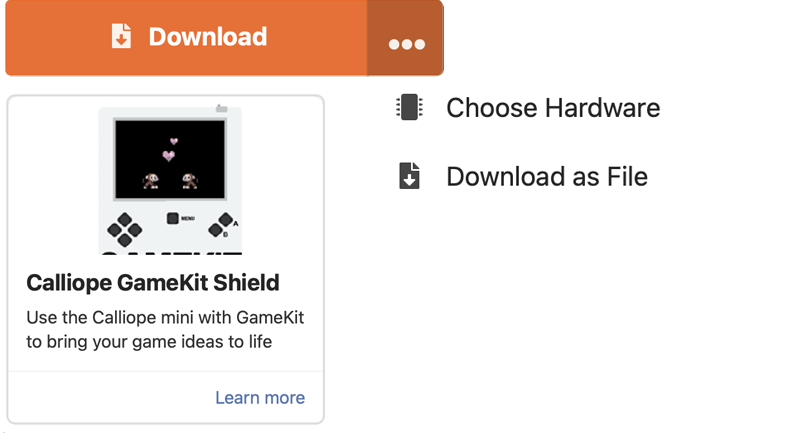
The hardware selection is important for playing the games for GameKit.
When selecting the hardware, choose Calliope GameKit Shield.
The first games to try out are available on the home page under Block games.

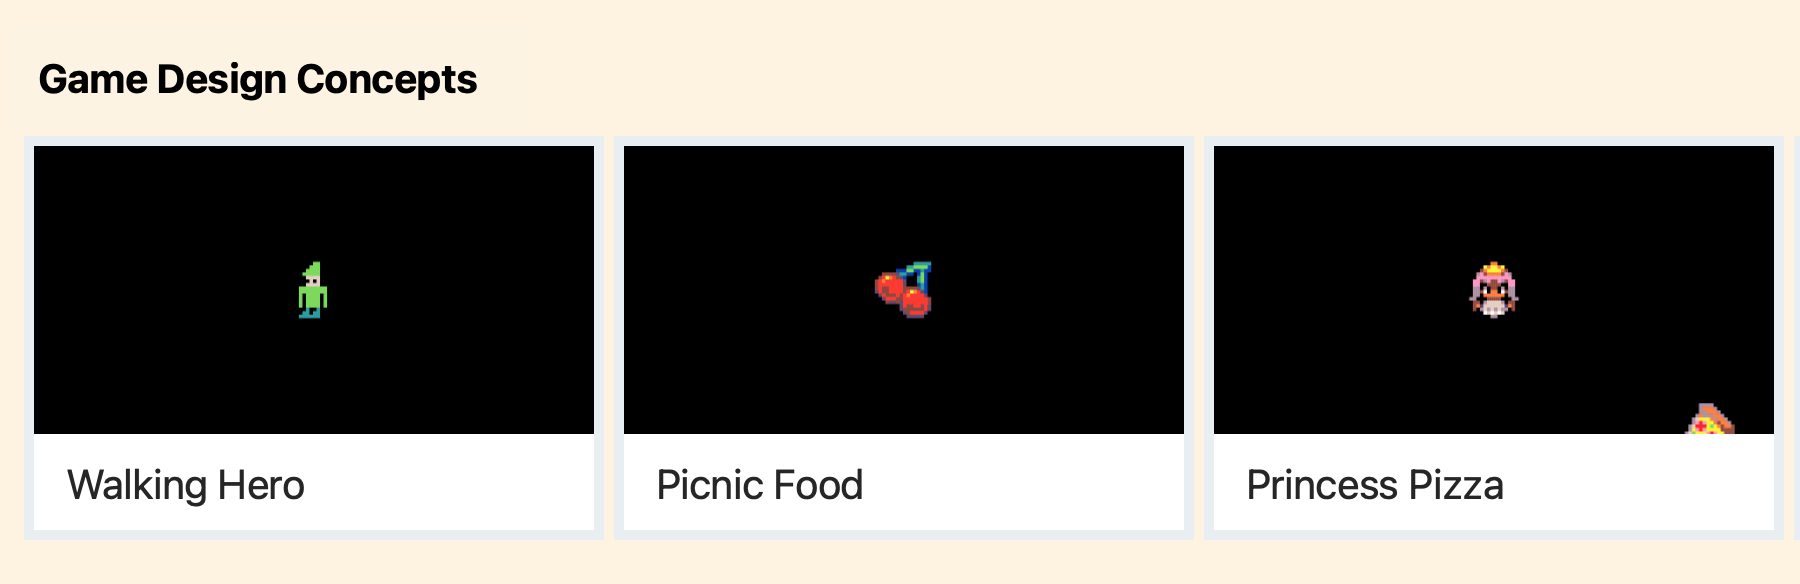
Under Game Design Concepts, step-by-step instructions introduce you to programming.
Programming instructions will be published shortly.
MakeCode Arcade
FAQ
Ensure that the connection between the Calliope mini and the GameKit is stable. To do this, follow these instructions step by step: First, connect the Calliope mini and the GameKit back to back. The Calliope mini is connected to the bottom of the GameKit via the pin header. IMPORTANT! Press the GameKit onto the pin header carefully but with sufficient force. Do not touch the display when pressing down. Apply pressure only to the area below the display. Make sure that the Calliope mini is completely and firmly seated on the plastic strip. Check the power supply.
If the Calliope mini is powered via USB, the GameKit is also automatically powered, so no additional power source is required. However, if the GameKit is operated without a USB connection, three AAA batteries are required and the GameKit must be switched on using the switch at the top right.
The switch at the top right turns the GameKit on or off.

Further information is available at Tiny Super Lab.