
Special features
The painting robot can be programmed in different ways: Painting at the push of a button, random painting or even painting, depending on the time of day or room temperature.
Good to know
You should have worked with the Calliope before you started this project.
You'll get to know that
You'll learn how to control motors with the Calliope and how to build a robot arm from cardboard and toothpicks. In a nutshell, you'll learn how to build robots!
Click here for a video tutorial popup: yes
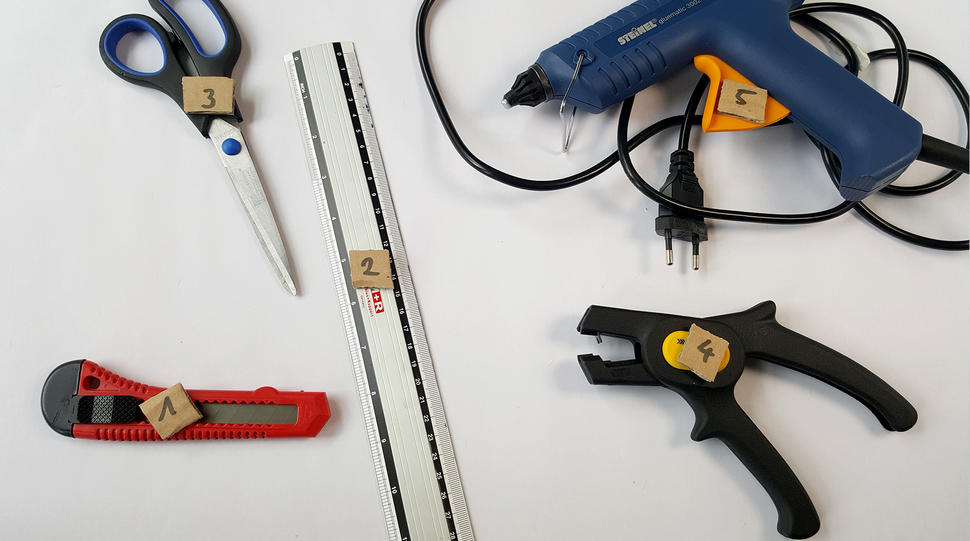
MATERIALS
- your Calliope Mini
- two robot gear motors (3-6 volts)
- two suitable tyres (these are available in the set with the engines!)
- one battery holder and four AA batteries (6 volts)
- a battery clip for the battery holder
- coloured cables
- cardboard box (about 50cm x 50 cm)
- toothpick
- fold-back Clips
- coloured pencils (fine liners)
- insulating tape
- an old book (or something similar)
TOOLS
- a cutter knife
- a ruler (as an help for cutting)
- a good pair of scissors
- a wire stripper (preferably an "automatic" wire stripper)
- a hot glue gun

Tip: It gets a little tricky to attach the motor cables to the Calliope. The best solution is to put the "Solderless Hammer Header" on the eyelets. You can get these in the English online shop Pimoroni. Then you can use ordinary breadboard cables for the connection.
Before you start, you should do a little test with your Calliope to make sure it works. You can find out how to program the Calliope here: http://calliope.cc/
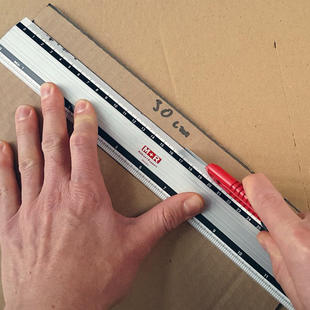
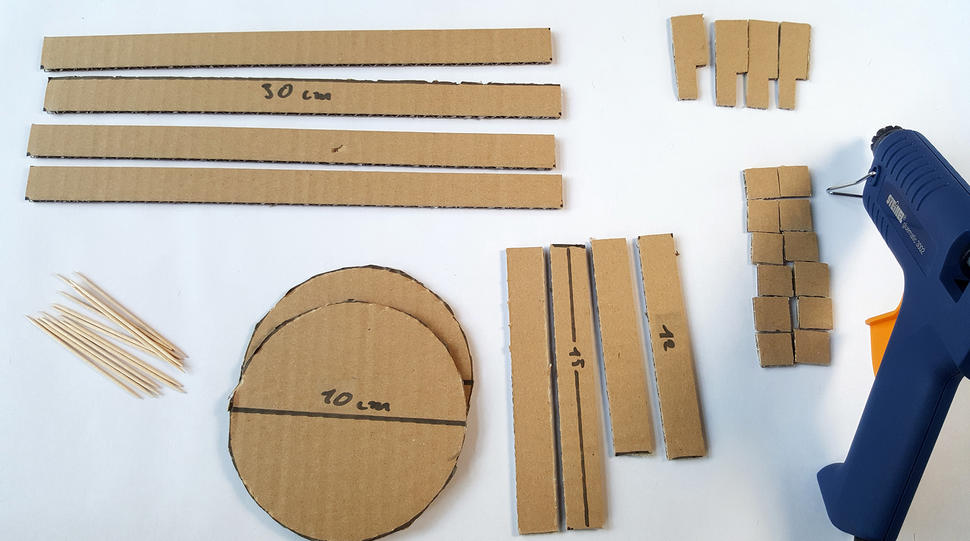
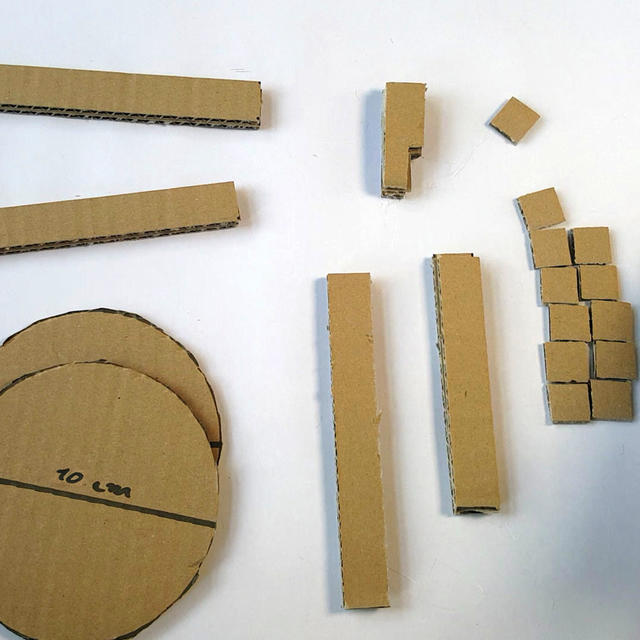
1: CUT THE CARDBOARD
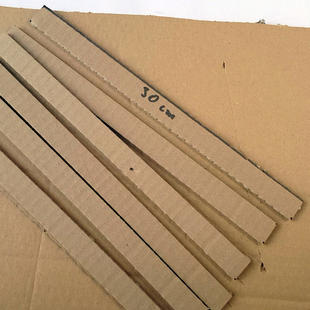
Cut 6 cardboard strips of about 30 cm length and 2 cm width.
You then divide two strips into four pieces, each 15 cm long. Cut another 3cm of two strips.

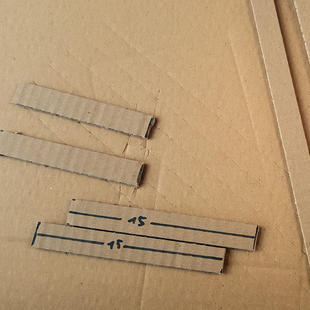
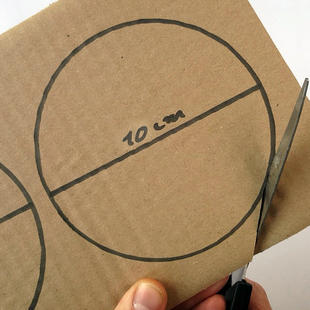
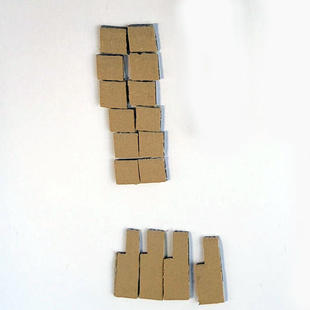
Use scissors to cut two discs with a diameter of 10 cm. Furthermore you need at least 12 squares with about 1.5 cm side length and four pieces - as shown in the picture - for the pen holder. The thinner end is there so that the fold-back clamp can be clamped to it later.
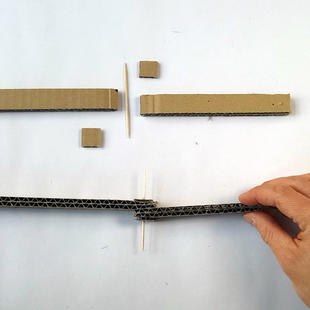
2: GLUE THE PARTS TOGETHER
Now collect all the prepared cardboard parts including the toothpicks and the hot glue gun. Now assemble the arm!
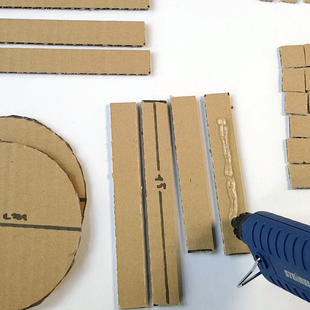

How to glue: Make sure not to glue at least 1 cm at the beginning and end of each strip. This is where the toothpicks come through later.
Glue the two short strips together, the two 15 cm strips and two of the four 30 cm strips. The four pieces with the thinner end all come together!
So we have:
Two long pieces
One piece with 15 cm
A piece with approx. 12 cm
Also a pen holder with 4 layers
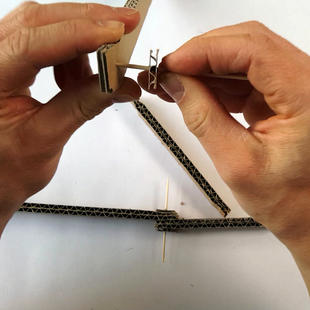
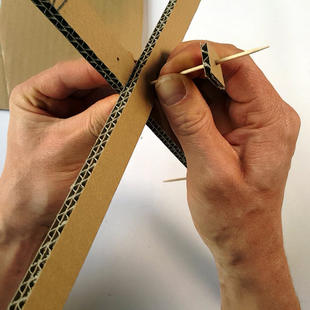
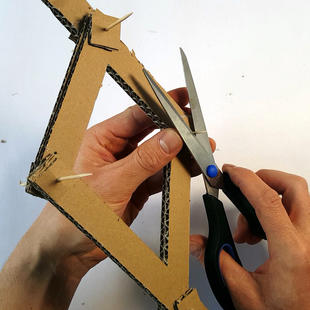
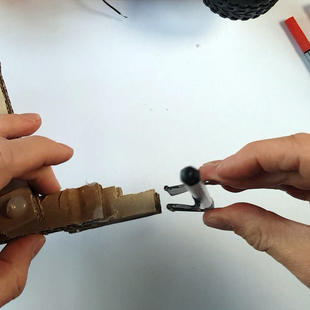
3: BUILDING THE JOINTS
Attention, now it's getting a little trickier. We now stick toothpicks through the cardboard parts to build joints. This needs some practice. Take care of your fingers and use a piece of spare cardboard as a base when piercing.
A joint always consists of a small square at the top, the parts to be connected in the middle, and another square below. We cut off the protruding toothpicks, but let a few millimetres of the toothpick protrude.
Tip: With a drawing pin or a needle you can pierce the holes, if the toothpicks are not sharp enough!
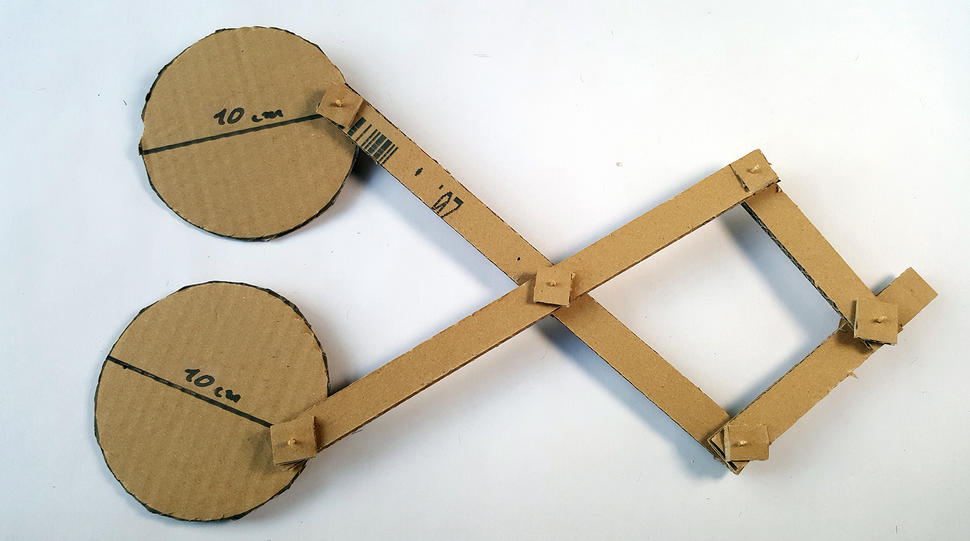
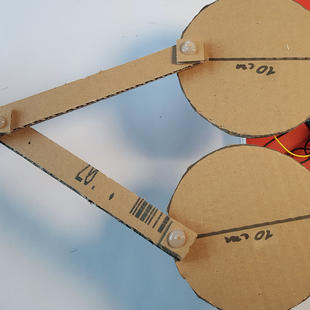
Here you can see what the robot arm should look like. Check if you have done everything right before you continue.
Tip: The point where the two long parts are connected should not be exactly in the middle. It is better if the joint is slightly offset. The longer part should point in the direction of the round discs!
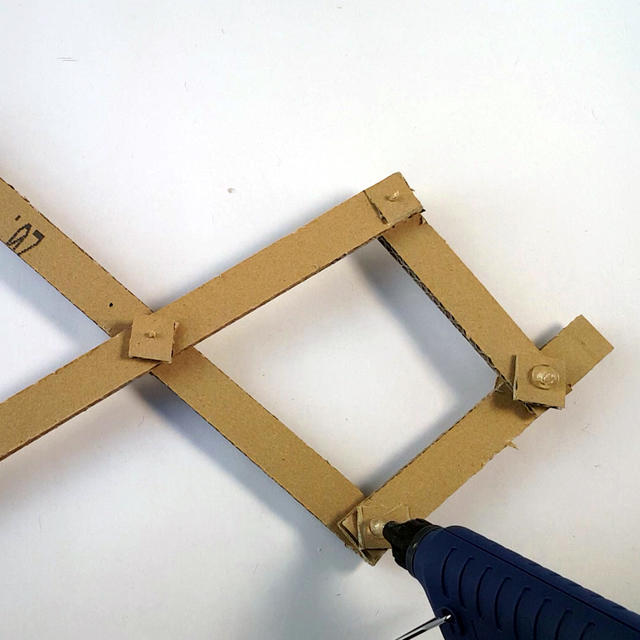
4: COMPLETE THE ROBOT ARM
A thick drop of hot glue is applied to each end of the toothpick so that the small square sits securely. This is important to prevent the toothpicks from slipping out.
Remember: When you have glued all the toothpicks on the top, let the glue cool down and glue all the toothpicks on the bottom.
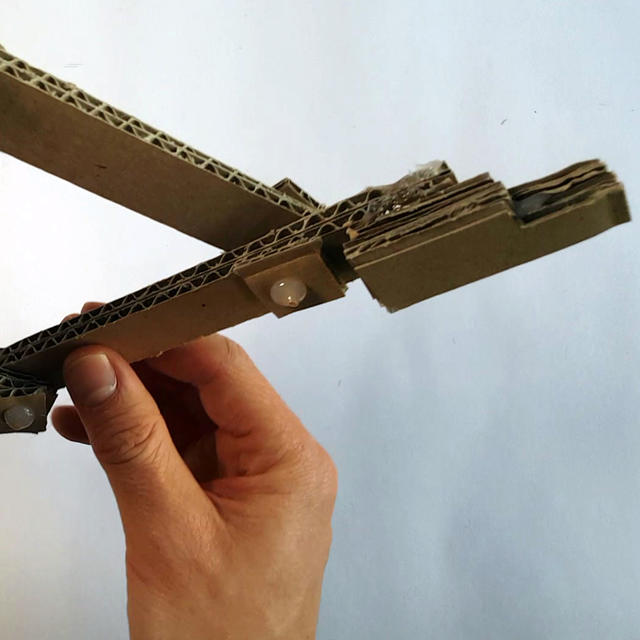
Stick the pen holder to the end of the robot arm.
Important: Glue the pen holder to the other side of the last joint. So not where the last part is lying.
Your robot arm is now ready. Try whether all joints are moving.... Then you can continue

5: PREPARING THE MOTORS
Put the tires on the geared motors.
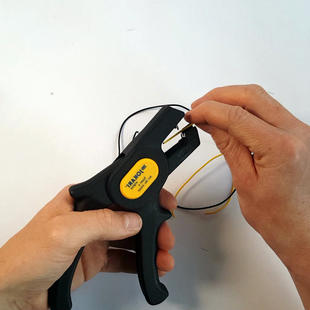
Then prepare 4 cables: Two yellow and two black. Insulate some of the sheath at both ends to expose the cable. The best way to do this is to use an automatic stripper, just like we do.
Now insert the open cable ends through the eyelet on the motor. You may have to twirl the strands, the small wires of the cable. Then fold the end of the cable so that it cannot slip out of the eyelet. The best way to do this is to wrap the bent cable end around yourself. Now you can solder the connection. Be careful and look for a tutorial.
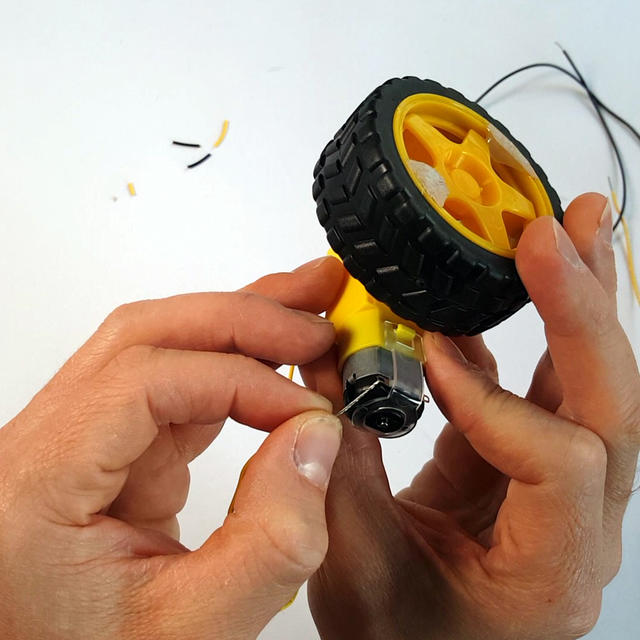
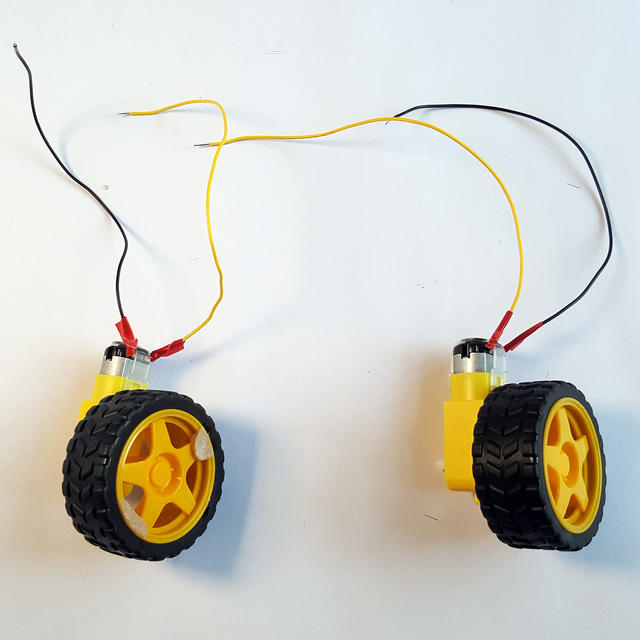
Each motor is connected by a coloured and by a black cable. We have re-insulated the open cable ends with insulating tape.
(...columns)
6: MOUNT THE MOTORS
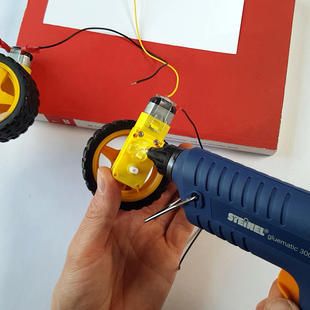
Now we glue the drives with some hot glue. For example, on an old book. Make sure that the motor axis at the bottom can rotate freely and does not stick.

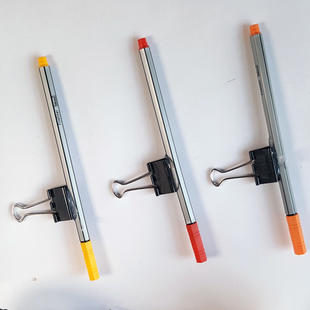
7: PREPARE THE PENS
The pens are stuck to fold-back clip at a time. The height of the fold-back clip on the pin corresponds to the height at which the tyres are glued to the ground.
Then you clamp a pen on our pen holder on the robot arm.
8: GLUE ON THE DRIVE
With hot glue we now glue the two discs of the robot arm onto the tyres. When the glue has cooled down, you can turn the two discs by hand and check whether the arm is moving.
Important: Make sure to glue the discs so that the actual robot arm is mounted on top of the discs. Otherwise the disc cannot rotate freely.

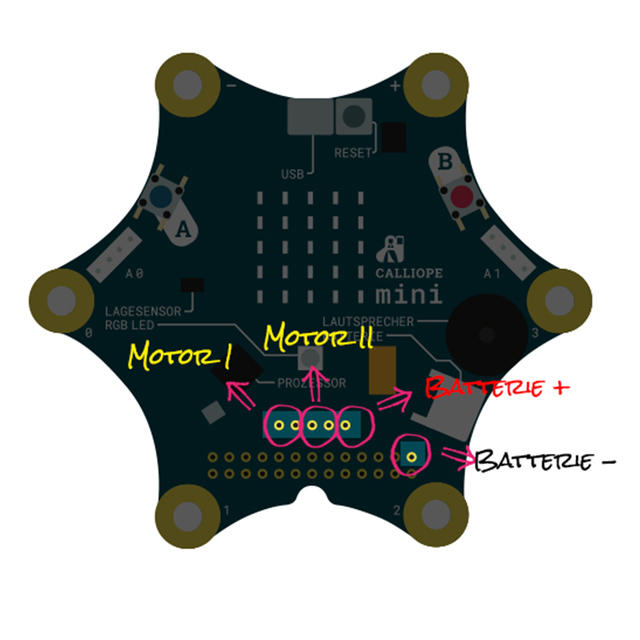
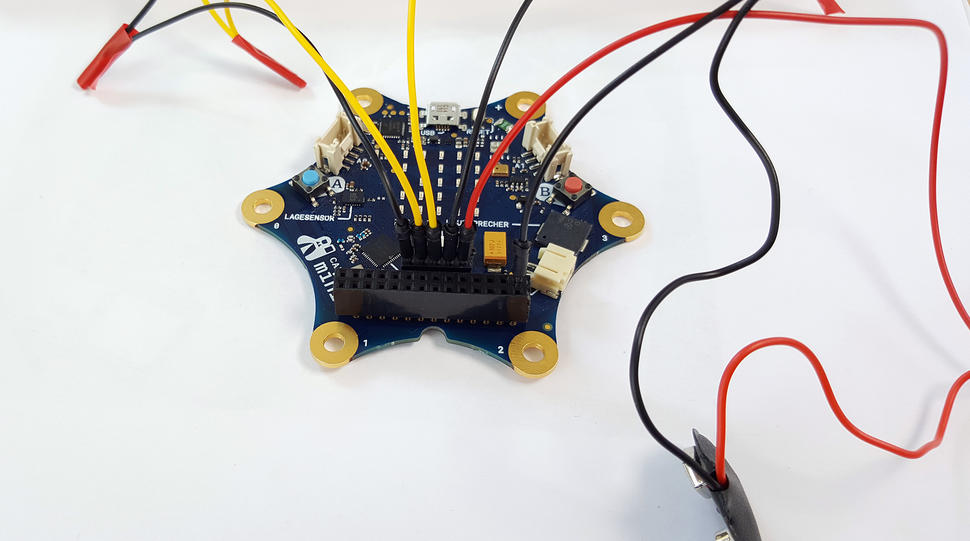
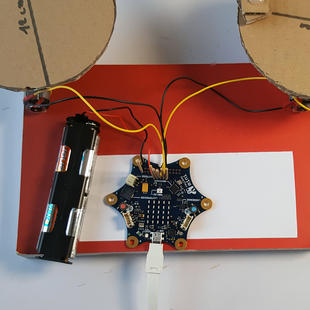
9: CONNECT THE CABLES
This is how the motors are connected. Which of the two motor cables you plug into which eyelet is not important. On the contrary, you can play with it, because it reverses the direction of the rotation!
It is important that the motors need an extra battery (6V). Connect it as shown in the picture.
In principle, you now have three choices:
- You can solder the cables to the calliope. But we would only advise professionals to do that.
- The best option is to equip the Calliope with the "Solderless Hammer Headers" and use breadboard cables.
- But if you don't have all that, there's a trick you can do with toothpicks. Pay special attention to the short circuit risk mentioned below.
SOLUTION WITH SLOTS
This is the solution with breadboard cable and "Solderless Header". We have prepared the cables as following:
Divide one breadboard cable to get two plugs. The open ends are then stripped. Then we can twist them with the battery and motor cables. If they hold well, they are wrapped with insulating tape to avoid a short circuit. You can also solder these "twirled" connections because you can pull the plugs out of the pins at any time.
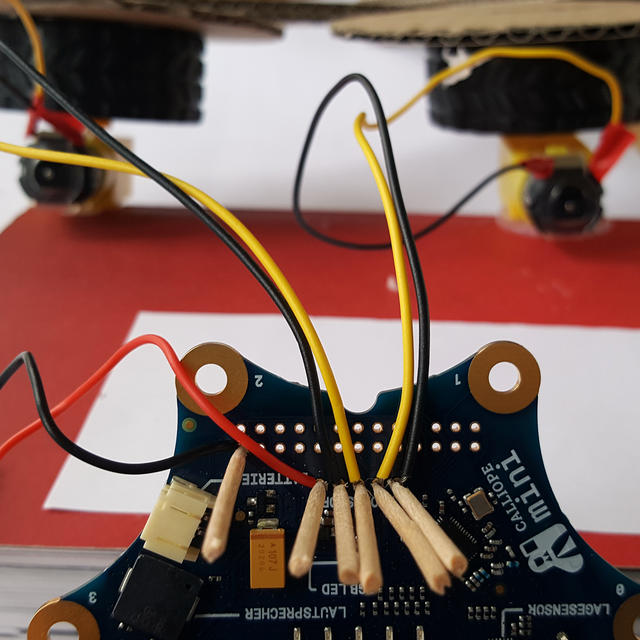
SOLUTION WITHOUT SLOTS
The solution with toothpicks: Simply insert the open end of the cable into the eye first and then add a short piece of toothpick. This keeps the cable in the eyelet.
Tip: If your cables are a bit thicker, it can help to sharpen the toothpicks with a knife. Make the toothpicks short so that they don't fall out so quickly.
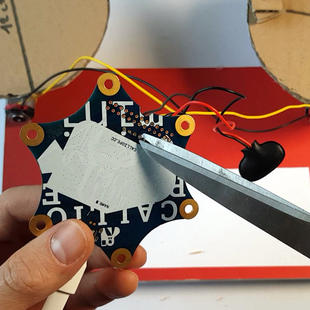
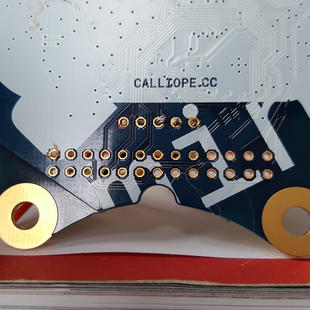
Attention Danger of short-circuit!
The cable ends that protrude from the bottom of the calliope must be removed.
If one of the cables touches an adjacent eyelet, there will be a short circuit later and you may have a defective Calliope Mini. Therefore, cut the cable ends on the bottom as short as possible. A toothpick can help to "sort" the small wires.
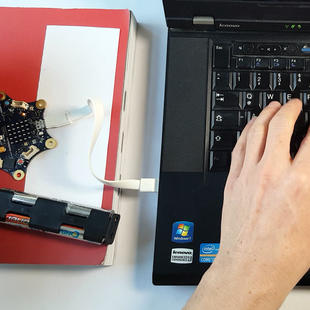
10: CONNECT BATTERY AND COMPUTER
Now connect the battery. Then connect the board to your computer. Place the painting robot on a free surface and lay it out with paper.
Tip: You need two power sources to operate the painting robot: The battery holder supplies the motors with power, but the Calliope itself also needs power. It gets this power either from the computer, with the USB cable connected, or from the small battery holder that comes with the Calliope.
11: PROGRAMMING THE PAINTING ROBOT
For the coding, go to https://makecode.calliope.cc and choose your version of the Calliope.
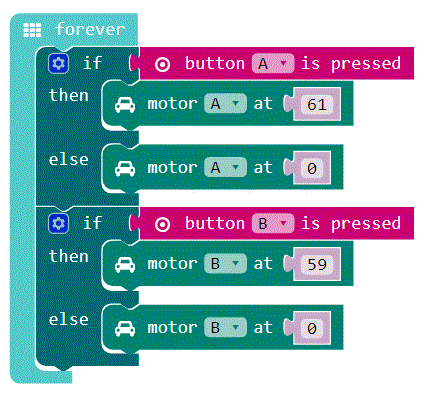
Here you can see our sample code for testing the painting robot. The buttons A and B of the Calliope each activate a motor of the painting robot. Build the code exactly the same way and download the file. Then copy the code to your Calliope. If you have problems with this step, you can find many good instructions here: https://calliope.cc/en/anleitungen
Programming tips
The motors can be run at a speed of 0 to 100 percent. At the connected 6 Volt a value between 55 and 70 is a good first start. From 70, the motors become so fast that the painting robot may disintegrate into its individual parts. Below 50, the power of the motor is often insufficient. These values change slightly with an empty battery. Then you can set the values higher.
By the way, the painting robot works best when the two motors rotate at different speeds. Try it out!
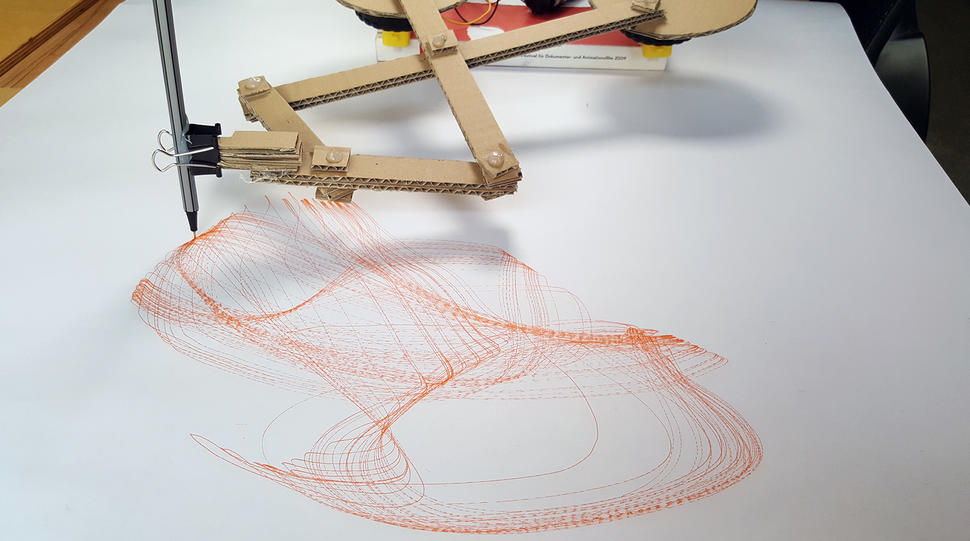
12: THE FIRST TEST
Place the painting robot on paper and press button A and button B of the Calliope. Both motors should rotate.
The painting robot in action
Click here for a video of the painting robot in action. popup: yes
This text as well as the image is published under a CC BY-NC 3.0 DE license popup: yes. It was originally published in German popup: yes by tuduu popup: yes and translated into English by the Calliope team.